Homelab Rebuild - It's Kubernetes or Nothin'!
2026-05-25
The itch is back... the itch that says "rebuild everything - it'll be perfect this time". I've decided that I'm scrapping traditional hypervisors entirely and going with baremetal Kubernetes... let's see what happens.
Rationale
My current homelab setup (as detailed in previous posts) is running on a 4-node Proxmox cluster, with a mix of traditional VM workloads, as well as a virtual Kubernetes cluster for testing more cloud-native application deployments.
This setup has worked pretty well so far, however as I move towards more of the deployments I test being cloud-native and built around Kubernetes, the Kubernetes-in-VMs setup is starting to become pretty limiting. I've seen some odd behaviours around scheduling and throttling (especially when there are multiple k8s VMs on a single physical host), and the way the CNI and CSI interacted with volumes and networking seemed to have some issues with the extra layer of abstraction.
By moving to baremetal Kubernetes I should be able to: 1. Force myself to learn the operational side of maintaining a long-lived cluster 2. Get the chance to play around with a few new technologies that didn't make too much sense in my previous setup - such as Talos, Rook Ceph, KubeVirt and Velero 3. Get a little bit more performance out of my hardware :)
Deployment and stack choices
Like I did with my previous Kubernetes deployment repo, I want to keep everything as IaC. This makes tracking everything that's running a lot easier, and will also come in handy if things ever go sideways and I need to quickly get resources into a known-good state.
Because I don't hate myself, this will all be done with Terraform nicely split out into many steps, with a small templating shim and Makefile to allow values to be specified in a single config .yaml.
Cluster - Talos and Kubernetes
Obviously the first set of technologies I'll need to pick in the stack is the underlying OS and how I'll deploy Kubernetes. Previous clusters I'd used had been bare kubeadm clusters on top of Arch or Fedora, however I felt like being a bit more adventurous this time. In magical VM world I could provision enough nodes to have a dedicated HA control plane, however I only have 4 servers and so this would leave me in an awkward position with only 1 worker node. I decided to go with 4 homogeneous control-and-worker nodes, as I'd rather the simplicity and resiliency of not worrying which nodes are dual-role and which are worker-only.
I'd been recommended Talos by a few people - and it certainly has an interesting value proposition. It's a Linux distro built for the sole purpose of running Kubernetes, with only the bare minimum software to get Kubernetes running, and an API server that can be used to provision, update and reconfigure the OS and Kubernetes. Looking a little more into it, it also seems to have a fairly well tested Terraform provider that supports bootstrapping and cluster upgrades. Perfect.
# Sample Talos node configuration - this controls the machine config and OS version
resource "talos_machine" "n0" {
  node                  = local.ordered_nodes[0].ip
  endpoint              = local.ordered_nodes[0].ip
  client_configuration  = talos_machine_secrets.this.client_configuration
  machine_configuration = data.talos_machine_configuration.controlplane[local.ordered_nodes[0].name].machine_configuration
  image                 = local.installer_image
  drain_on_upgrade      = true
}

# Sample Talos cluster definition - this controls the installed Kubernetes cluster
resource "talos_cluster" "this" {
  depends_on = [talos_machine.n0]

  node                 = local.ordered_nodes[0].ip
  endpoint             = local.ordered_nodes[0].ip
  client_configuration = talos_machine_secrets.this.client_configuration
  kubernetes_version   = var.kubernetes_version
  control_plane_nodes  = values(var.nodes)
}
The Terraform provider is legitimately very cool. All I needed to do on the physical nodes themselves was boot into the Talos runtime from a USB, then installation of the OS to the nodes' disks and setup of the cluster was entirely done by Terraform.

After leaving the Terraform for a while to run (the initial bootstrap can take a while), I had a happy cluster to work with :D
Platform - Cilium, Rook Ceph and KubeVirt
Next in the stack is what I'm considering the "Platform". This is the base, fundamental set of technologies that allow everything on top of Kubernetes to run at all.
A CNI (Container Network Interface) deals with allocating IPs to all pods and services, then ensuring that traffic can flow between them, and I've gone with Cilium because well... it's just always worked for me. I'd love to pretend that it's for any of the super legitimate reasons such as:
- Advanced security policy integration using Cilium-specific network policy resources, with L7 ruleset support
- Blazing fast performance with eBPF to avoid unnecessarily traversing certain parts of the Linux networking stack
- Excellent observability with Hubble to facilitate quicker debugging, and more thorough monitoring of services
- Convergence from larger providers in the industry - seemingly every cloud provider and their dog is moving to Cilium or a variant thereof
- Large set of in-house feature integration so you no longer have to worry about gateway controllers or ingress controllers... or complex external loadbalancer advertisement controllers
But in all honesty... it's the only CNI I've ever used, I've never had any problems with it... and until such a time comes I'll keep deploying it :)
# Sample basic Cilium chart (you'll almost certainly need more values in prod)
resource "helm_release" "cilium" {
  name       = "cilium"
  repository = "https://helm.cilium.io/"
  chart      = "cilium"
  version    = var.cilium_version
  namespace  = "kube-system"
  wait       = false

  values = yamlencode({
    ipam                 = { mode = "kubernetes" }
    kubeProxyReplacement = true
    externalIPs          = { enabled = true }
    bpf                  = { masquerade = true }

    # Point at Talos' KubePrism
    k8sServiceHost = "localhost"
    k8sServicePort = 7445

    # Talos'll get angry if Cilium tries to mess with cgroups
    cgroup = {
      autoMount = { enabled = false }
      hostRoot  = "/sys/fs/cgroup"
    }

    ingressController = {
      enabled          = true
      default          = true
      loadbalancerMode = "dedicated"
    }

    # Talos needs security bits
    securityContext = {
      capabilities = {
        ciliumAgent = [
          "CHOWN", "KILL", "NET_ADMIN", "NET_RAW", "IPC_LOCK",
          "SYS_ADMIN", "SYS_RESOURCE", "DAC_OVERRIDE", "FOWNER",
          "SETGID", "SETUID",
        ]
        cleanCiliumState = ["NET_ADMIN", "SYS_ADMIN", "SYS_RESOURCE"]
      }
    }

    hubble = {
      enabled = true
      relay   = { enabled = true }
    }

    envoy = {
      enabled = true
    }
  })
}
A small bit of Terraform and bam!
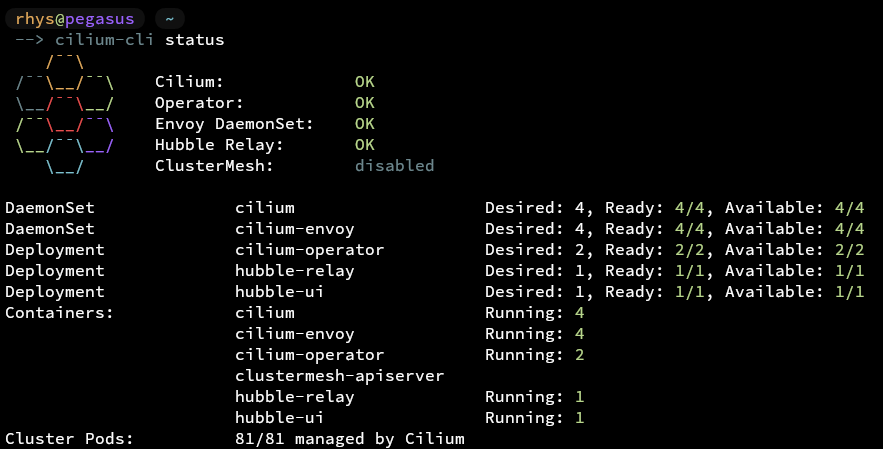
Cilium!
A CSI (Container Storage Interface) is in charge of well... setting up storage for containers. It watches for created PVCs (Persistent Volume Claims), and creates associated PVs (Persistent Volumes) to go with them. Then when a pod is spun up that references a PVC to be accessed, it runs the needed steps on the pod's host node to mount the backing PV to a known location.
Unlike the choice for CNI, where most options will work in most scenarios, choosing the correct CSI is very important for the resiliency, performance and ease-of-management of your cluster. Generally, barring situations where you're a big enterprise that's locked into a specific storage vendor and their CSI, there are 2 options (that I can speak of) that are sensible for deployment:
-
Longhorn's the simple "just deploy it and it'll work" solution, and is probably the best experience for users who are new to Kubernetes or don't really want to think about storage. It's fairly resilient by design, with 3x replication for all data across your nodes by default and supports all the features you'd expect around snapshotting and backups.
It does however start to fall apart in more advanced use-cases where admins may want to stretch and tune storage for very large or performant clusters, and it can also feel very opaque for advanced use-cases where admins may want to have some of the complexity exposed in return for a bit more architectural reassurance. Anecdotally, a fair few experienced admins also mention it falling apart in weird ways... which most complex systems probably will do at some point anyway, but due to the simplicity of its standard operation it can be hard to understand the best path to recovery.
-
Rook Ceph is the advanced "scales and fills as many roles... as the engineer you'll be paying to manage it" solution. Ceph's an advanced distributed storage solution built with resiliency (reading about CRUSH is fun) at the forefront, and has just about every knob an admin could wish to fiddle with. It also provides all three types of storage you'll typically encounter - it's built fundamentally as an object store, and provides RBD for block storage, CephFS as a POSIX filesystem and RGW as an S3-compatible object interface. Rook Ceph is a nice solution to manage Ceph clusters themselves within Kubernetes, and also to use Ceph clusters as the Kubernetes CSI. There's nothing too special going on under the hood either, so if everything starts to fall apart, well-tested recovery options and debugging methods for normal Ceph clusters still apply.
All of this is a double edged sword though... more knobs to tune? Sounds like more knobs to set wrong. Ceph isn't known for being resource shy either, typically requiring ~4GB RAM for each OSD (yep... each physical disk has an entire daemon), and also usually needing 10Gbps networking to get any kind of reasonable performance. Additionally, while Rook Ceph does provide a snapshotting capability backed by Ceph snapshots, it doesn't have a backup solution integrated so you'll need to find something to do that.
Of those two options, I'm gonna be going with Rook Ceph - partly because I'm already familiar with the basics of Ceph clusters when I used them with Proxmox, and partly because I'm up for the challenge and would rather get hands on experience with it in a low-cortisol setting like my homelab rather than fuck up a big cluster at work :) Rook Ceph should also prove itself useful in the long run with its S3-compatible interface, as MinIO is in a bit of an awkward state at the moment. I've also just never been a huge fan of how opaque Longhorn can feel, and not trusting your storage provider can feel a little scary.
# Sample Rook operator - provisions and manages Ceph clusters you define
resource "helm_release" "rook_ceph_operator" {
  name       = "rook-ceph"
  repository = "https://charts.rook.io/release"
  chart      = "rook-ceph"
  version    = var.rook_ceph_version
  namespace  = kubernetes_namespace.rook_ceph.metadata[0].name
}

# Sample Ceph CSI drivers - manages getting Ceph RBD/CephFS to provision PVs and mount to pods
resource "helm_release" "ceph_csi_drivers" {
  depends_on = [helm_release.rook_ceph_operator]
  name       = "ceph-csi-drivers"
  repository = "https://ceph.github.io/ceph-csi-operator"
  chart      = "ceph-csi-drivers"
  version    = var.ceph_csi_drivers_version
  namespace  = kubernetes_namespace.rook_ceph.metadata[0].name

  values = yamlencode({
    operatorConfig = {
      namespace = kubernetes_namespace.rook_ceph.metadata[0].name
    }
    drivers = {
      rbd = {
        enabled        = true
        name           = "${kubernetes_namespace.rook_ceph.metadata[0].name}.rbd.csi.ceph.com"
        snapshotPolicy = "volumeSnapshot"
      }
      cephfs = {
        enabled        = true
        name           = "${kubernetes_namespace.rook_ceph.metadata[0].name}.cephfs.csi.ceph.com"
        snapshotPolicy = "volumeSnapshot"
      }
    }
  })
}

# Sample Ceph cluster - defines the Ceph cluster that the operator will provision
resource "helm_release" "rook_ceph_cluster" {
  depends_on = [helm_release.ceph_csi_drivers]
  name       = "rook-ceph-cluster"
  repository = "https://charts.rook.io/release"
  chart      = "rook-ceph-cluster"
  version    = var.rook_ceph_version
  namespace  = kubernetes_namespace.rook_ceph.metadata[0].name

  values = yamlencode({
    operatorNamespace = kubernetes_namespace.rook_ceph.metadata[0].name

    cephClusterSpec = {
      mon = {
        count                = 3
        allowMultiplePerNode = false
      }
      mgr = {
        count = 2
      }

      # Disruption budgets help ensure that Kubernetes operations (e.g. node drain)
      # don't affect cluster resiliency
      disruptionManagement = {
        managePodBudgets      = true
        osdMaintenanceTimeout = 30
      }

      storage = {
        useAllNodes   = true
        useAllDevices = false
        # Use all the SATA drives in my servers for the pool
        devicePathFilter = "^/dev/disk/by-id/ata-"
      }
    }

    cephBlockPools = [
      {
        name = "replicapool"
        spec = {
          failureDomain = "host"
          replicated = {
            size                   = 3
            requireSafeReplicaSize = true
          }
          parameters = {
            min_size = "2"
          }
        }
        storageClass = {
          enabled              = true
          name                 = "ceph-block"
          isDefault            = true
          reclaimPolicy        = "Delete"
          allowVolumeExpansion = true
          parameters = {
            # A bunch in here, see GitHub for everything...
          }
        }
      },
    ]

    cephFileSystems = [
      {
        name = "ceph-filesystem"
        spec = {
          metadataPool = {
            replicated = { size = 3 }
            parameters = { min_size = "2" }
          }
          dataPools = [{
            name          = "data0"
            failureDomain = "host"
            replicated    = { size = 3 }
            parameters    = { min_size = "2" }
          }]
          metadataServer = {
            activeCount   = 1
            activeStandby = true
          }
        }
        storageClass = {
          enabled              = true
          name                 = "ceph-filesystem"
          reclaimPolicy        = "Delete"
          allowVolumeExpansion = true
          parameters = {
            # A bunch in here, see GitHub for everything...
          }
        }
      },
    ]

    # Not set up RGW yet...
    cephObjectStores = []
  })
}
Once again, deployment was just a small sprinkling of helm-in-terraform.

Deployed. Profit?
KubeVirt is the last piece of technology that I'll be considering core to the "Platform", although there really isn't much choice to it... you either have it or you don't. It's a very cool piece of technology though that allows you to run KVM VMs on your nodes, but managed as Kubernetes resources.
This is great if you have legacy workloads that are hard to migrate, picky users that won't give up their VMs, or sometimes just virtual appliances that are a lot easier to manage as fixed machines. The coolest part about KubeVirt is that it doesn't just expose VMs as a singular resource that can be run in the cluster, it abstracts them out so they can follow Kubernetes-native concepts such as resource sets and ephemerality. It also provides full CSI and CNI integration, and ways of mapping Kubernetes resources such as secrets into your VMs.
# Online KubeVirt operator resource
data "http" "kubevirt_operator" {
  url = "https://github.com/kubevirt/kubevirt/releases/download/${var.kubevirt_version}/kubevirt-operator.yaml"
}

# Operator resource contents...
data "kubectl_file_documents" "kubevirt_operator" {
  content = data.http.kubevirt_operator.response_body
}

# Sample KubeVirt operator deployment
resource "kubectl_manifest" "kubevirt_operator" {
  for_each          = data.kubectl_file_documents.kubevirt_operator.manifests
  yaml_body         = each.value
  server_side_apply = true
  wait              = true
}

# Sample KubeVirt cluster definition
resource "kubectl_manifest" "kubevirt_cr" {
  depends_on = [kubectl_manifest.kubevirt_operator]

  yaml_body = yamlencode({
    apiVersion = "kubevirt.io/v1"
    kind       = "KubeVirt"
    metadata = {
      name      = "kubevirt"
      namespace = "kubevirt"
    }
    spec = {
      # Configurations to get USB passthrough working
      configuration = {
        developerConfiguration = {
          featureGates = concat(
            var.kubevirt_feature_gates,
            ["HostDevices"],
          )
        }
        permittedHostDevices = {
          usb = [for d in var.kubevirt_permitted_usb_devices : {
            resourceName = d.resource_name
            selectors = [{
              vendor  = d.vendor
              product = d.product
            }]
          }]
        }
      }
      imagePullPolicy = "IfNotPresent"
      workloadUpdateStrategy = {
        workloadUpdateMethods = ["LiveMigrate"]
      }
    }
  })

  server_side_apply = true
  wait              = true
}
Again... small bit of Terraform, and everything's working.
Backups - Velero
It's all great getting a good core stack setup with a lot of complex deployments... but without a solid backup strategy you're very much shooting yourself in the foot. As mentioned above, as I'm using Ceph as my CSI, I don't have any bundled backup solution that should Just Work™.
Enter Velero. Velero is an all-in-one backup solution that provides a controller that manages backups of PVs as well as Kubernetes resources. It supports fairly complex backup schedules and policies and has integrations with many different remote storage locations.
For Kubernetes resources, Velero's operator is able to easily grab them directly from your cluster as per your defined filtering rules at scheduled intervals and store them in your backup repository. For PVs, things do get a little bit more complex however. Velero integrates with existing resources defined by Kubernetes' Volume Snapshotter CRDs (which will usually require an integration from your CSI) to request snapshots of your PVs to be made at a given point in time. It will then attach them to data mover pods which will use kopia to create incremental backups of the PV contents to your backup repository. It can be a little tricky to get working at first, but once done everything should be very stable.
As a remote storage location, I'll end up going with R2 as S3-compatible remote backups are probably the most thoroughly tested there are, and R2's pricing and performance are hard to beat at the moment.
velero restore create restore-myapp-20260525 \
  --from-backup backup-2026-05-24-0300 \
  --namespace-mappings old-namespace:new-namespace \
  --restore-volumes=true \
  --wait
The other half of Velero's magic comes in its ability to restore cluster state from a given point in time. Since both Kubernetes resources and volume contents can be backed up, and the incremental backups store a rough history of resource state over time, the Velero cli can be used to perform advanced operations to restore entire namespaces or clusters worth of resources exactly how they were when the backup was started.
resource "helm_release" "velero" {
  name       = "velero"
  namespace  = kubernetes_namespace_v1.velero.metadata[0].name
  repository = "https://vmware-tanzu.github.io/helm-charts"
  chart      = "velero"
  version    = var.velero_chart_version

  values = compact([
    yamlencode(merge(
      {
        upgradeCRDs      = true
        cleanUpCRDs      = false
        snapshotsEnabled = true

        deployNodeAgent = true

        nodeAgent = {
          extraArgs = [
            "--node-agent-configmap=${kubernetes_config_map_v1.node_agent_config.metadata[0].name}",
          ]
        }

        initContainers = [{
          name  = "velero-plugin-for-aws"
          image = var.velero_plugin_for_aws_image
          volumeMounts = [{
            mountPath = "/target"
            name      = "plugins"
          }]
        }]

        credentials = {
          useSecret      = true
          existingSecret = kubernetes_secret_v1.velero_r2.metadata[0].name
        }

        configuration = {
          defaultVolumesToFsBackup = false
          features = "EnableCSI"
          defaultSnapshotMoveData = true

          backupStorageLocation = [{
            name     = "default"
            provider = "aws"
            bucket   = var.r2_bucket
            default  = true
            config = {
              region           = "auto"
              s3ForcePathStyle = "true"
              s3Url            = "https://${var.r2_account_id}.r2.cloudflarestorage.com"
              checksumAlgorithm = ""
            }
          }]

          volumeSnapshotLocation = []
        }
      },
      var.velero_image_tag != "" ? {
        image = {
          tag = var.velero_image_tag
        }
      } : {},
    )),
    var.velero_values_override,
  ])
}

# Sample Velero backup schedule including PV backup
resource "kubectl_manifest" "schedule_daily_full" {
  depends_on = [helm_release.velero]

  yaml_body = yamlencode({
    apiVersion = "velero.io/v1"
    kind       = "Schedule"
    metadata = {
      name      = "daily-full"
      namespace = kubernetes_namespace_v1.velero.metadata[0].name
    }
    spec = {
      schedule = var.backup_schedule_cron
      template = {
        ttl                = var.backup_retention
        includedNamespaces = ["*"]
        excludedNamespaces = var.excluded_namespaces
        storageLocation    = "default"
        snapshotVolumes          = true
        snapshotMoveData         = true
        defaultVolumesToFsBackup = false
        includeClusterResources  = true
      }
    }
  })

  server_side_apply = true
}
Velero is also, luckily, simple to deploy with Terraform :)
Services - ArgoCD, cert-manager, ExternalDNS, registry, Grafana Stack, CNPG
Anything that is not critical to running workloads, but is useful for ensuring that everything runs smoothly and is easy to use will be considered a "Platform Service". For each of these there isn't really a huge set of alternatives, but I'll explain why I think they're useful to have in the stack and how they're deployed.
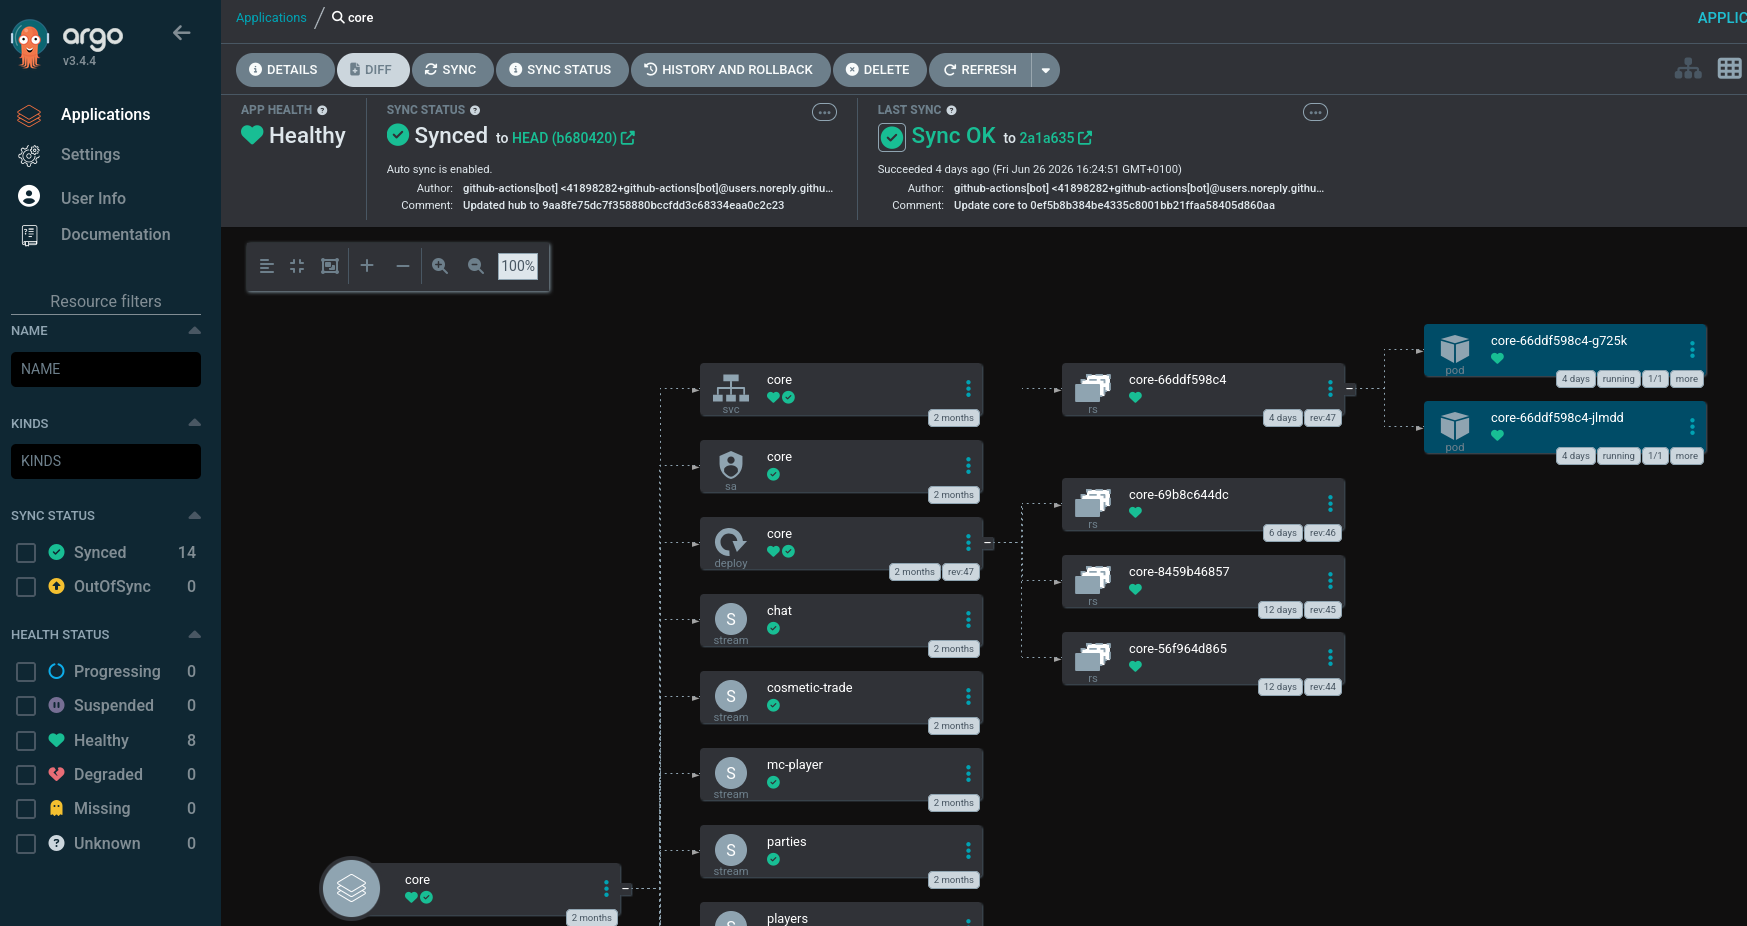
ArgoCD is well... a CD application. It allows you to point it at resources you'd like to be deployed into the cluster (ideally in source control), either as Helm charts or raw manifests, and then it manages keeping the cluster state consistent with that. It also provides a very nice GUI for monitoring the deployed resources and viewing where there may be syncing issues.
# Sample ArgoCD installation
resource "helm_release" "argocd" {
  name       = "argocd"
  repository = "https://argoproj.github.io/argo-helm"
  chart      = "argo-cd"
  version    = var.argocd_version
  namespace  = kubernetes_namespace_v1.argocd.metadata[0].name

  values = yamlencode({
    global = { domain = "argocd.${var.ingress_domain}" }

    configs = {
      params = {
        "server.insecure" = true
      }
    }

    server = {
      ingress = {
        enabled          = true
        ingressClassName = var.ingress_class_name
        annotations = {
          "cert-manager.io/cluster-issuer" = var.cluster_issuer_name
        }
        tls = true
      }
    }
  })
}
Argo also has some cool advanced features to allow gradual rollouts of updates and features through Argo Rollouts, so that might be a fun things to explore in the future.
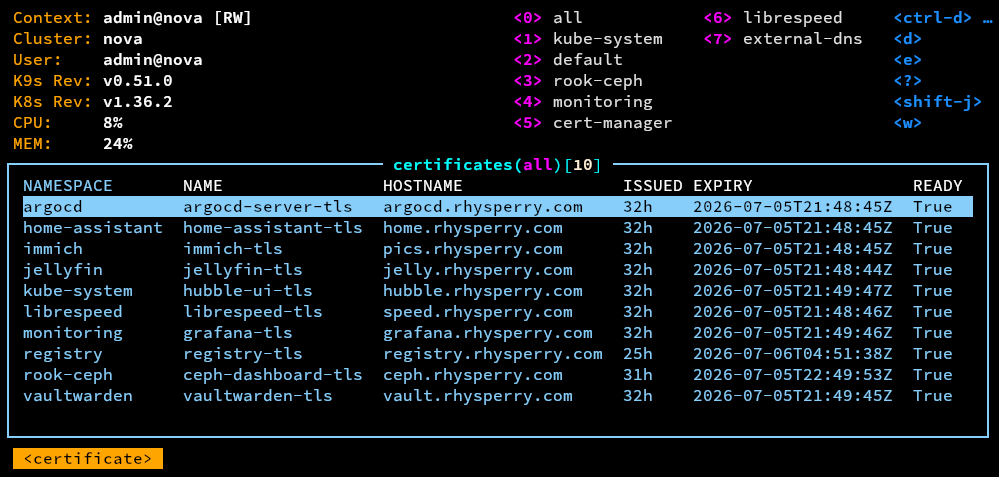
cert-manager does what it says on the tin - manages your certificates. It allows applications to request certificates as Kubernetes resources, then cert-manager will use an issuer (such as Let's Encrypt) to get a valid certificate, which it'll hand back to the application in a secret. It manages the full lifetime of the certificate including automatic renewal, so solves a lot of the headaches that are traditionally associated with securing services. The Cilium ingress provider also supports tying in with cert-manager, so exposing services externally becomes very easy.
# Sample cert-manager operator installation
resource "helm_release" "cert_manager" {
  name       = "cert-manager"
  repository = "https://charts.jetstack.io"
  chart      = "cert-manager"
  version    = var.cert_manager_version
  namespace  = kubernetes_namespace_v1.cert_manager.metadata[0].name
}

# Sample cert-manager issuer definition
resource "kubectl_manifest" "cluster_issuer" {
  depends_on = [ helm_release.cert_manager ]

  yaml_body = yamlencode({
    apiVersion = "cert-manager.io/v1"
    kind       = "ClusterIssuer"
    metadata = {
      name = var.cluster_issuer_name
    }
    spec = {
      acme = {
        server  = var.acme_server
        email   = var.acme_email
        profile = var.acme_profile
        privateKeySecretRef = {
          name = "${var.cluster_issuer_name}-account-key"
        }
        solvers = [{
          dns01 = {
            cloudflare = {
              apiTokenSecretRef = {
                name = kubernetes_secret_v1.cloudflare_api_token_cert_manager.metadata[0].name
                key  = "api-token"
              }
            }
          }
        }]
      }
    }
  })
}
Additionally, taking advantage of how well cert-manager is able to manage certificates, it's possible to move to Let's Encrypt's fancy new shortlived ACME profile for certificates that only last a week, therefore reducing the impact of leaked key material. For the Let's Encrypt challenge, it's easiest to use the DNS challenge as it doesn't require the webserver itself to be exposed publicly.

ExternalDNS is a good companion to cert-manager - it provides a way to dynamically update external DNS records based on Kubernetes resources such as services and ingresses. Combined with cert-manager, this allows applications to be exposed from inside the cluster on subdomains with trusted certificates, with the only requirement being a few annotations on an ingress.
resource "helm_release" "external_dns" {
  name       = "external-dns"
  repository = "https://kubernetes-sigs.github.io/external-dns/"
  chart      = "external-dns"
  version    = var.external_dns_version
  namespace  = kubernetes_namespace_v1.external_dns.metadata[0].name

  values = yamlencode({
    provider = {
      name = "webhook"
      webhook = {
        image = {
          repository = "ghcr.io/home-operations/external-dns-unifi-webhook"
          tag = var.external_dns_unifi_webhook_version
        }
        env = [
          {
            name = "UNIFI_HOST"
            value = var.unifi_api_url
          },
          {
            name = "UNIFI_API_KEY"
            valueFrom = {
              secretKeyRef = {
                name = kubernetes_secret_v1.unifi_api_token_external_dns.metadata[0].name
                key  = "UNIFI_API_KEY"
              }
            }
          }
        ]
        livenessProbe = {
          httpGet = {
            path = "/healthz"
            port = "http-webhook"
          }
          initialDelaySeconds = 10
          timeoutSeconds = 5
        }
        readinessProbe = {
          httpGet = {
            path = "/readyz"
            port = "http-webhook"
          }
          initialDelaySeconds = 10
          timeoutSeconds = 5
        }
      }
    }

    domainFilters = var.external_dns_domain_filters
    policy        = var.external_dns_policy

    registry   = "txt"
    txtOwnerId = var.external_dns_txt_owner_id

    sources = ["service", "ingress"]
  })
}
All ExternalDNS needs to function is a plugin for your external DNS provider of choice, authentication credentials for the provider, and then some rules to match what Kubernetes resources should or shouldn't be allowed to update DNS. In my case I'm just updating my UniFi firewall's local DNS entries to keep everything internal, but I've used it with CloudFlare in the past without problems.
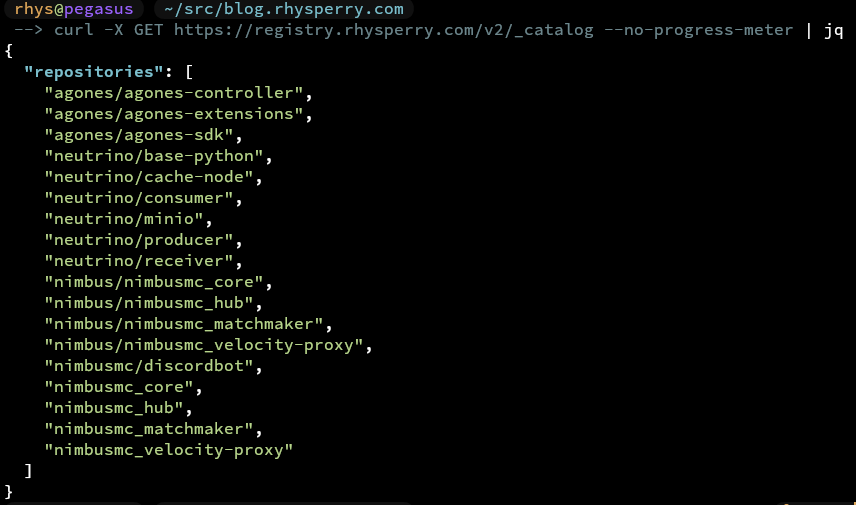
Although fairly basic, having a local registry is one of those things you don't really realise you wanted until it's there. It's nothing fancy - just the upstream registry image with a PVC stuck on it and an ingress in front (plus a prevent_destroy so I don't terraform destroy all my images into the void). It mostly comes in handy for local development - pushing images to something sat on my own network is just faster than round-tripping out to a public registry, and it means my half-baked work-in-progress tags get to stay nice and private :)
resource "kubernetes_persistent_volume_claim_v1" "registry" {
  metadata {
    name      = "registry-data"
    namespace = kubernetes_namespace_v1.registry.metadata[0].name
  }
  spec {
    access_modes       = ["ReadWriteOnce"]
    storage_class_name = var.registry_storage_class
    resources {
      requests = {
        storage = var.registry_storage_size
      }
    }
  }
  lifecycle {
    prevent_destroy = true
  }
}

resource "kubernetes_deployment_v1" "registry" {
  metadata {
    name      = "registry"
    namespace = kubernetes_namespace_v1.registry.metadata[0].name
  }

  spec {
    replicas = 1
    strategy {
      type = "Recreate"
    }
    selector {
      match_labels = {
        app = "registry"
      }
    }
    template {
      metadata {
        labels = {
          app = "registry"
        }
      }
      spec {
        container {
          name  = "registry"
          image = "registry:${var.registry_image_tag}"
          port {
            container_port = 5000
            name           = "http"
          }
          volume_mount {
            name       = "data"
            mount_path = "/var/lib/registry"
          }
        }
        volume {
          name = "data"
          persistent_volume_claim {
            claim_name = kubernetes_persistent_volume_claim_v1.registry.metadata[0].name
          }
        }
      }
    }
  }
}

resource "kubernetes_service_v1" "registry" {
  metadata {
    name      = "registry"
    namespace = kubernetes_namespace_v1.registry.metadata[0].name
  }
  spec {
    selector = {
      app = "registry"
    }
    port {
      name        = "http"
      port        = 5000
      target_port = "http"
    }
  }
}

resource "kubernetes_ingress_v1" "registry" {
  metadata {
    name      = "registry"
    namespace = kubernetes_namespace_v1.registry.metadata[0].name
    annotations = {
      "cert-manager.io/cluster-issuer" = var.cluster_issuer_name
      "ingress.cilium.io/request-timeout" = "600s"
    }
  }

  spec {
    ingress_class_name = var.ingress_class_name
    tls {
      hosts       = ["registry.${var.ingress_domain}"]
      secret_name = "registry-tls"
    }
    rule {
      host = "registry.${var.ingress_domain}"
      http {
        path {
          path      = "/"
          path_type = "Prefix"
          backend {
            service {
              name = kubernetes_service_v1.registry.metadata[0].name
              port {
                number = 5000
              }
            }
          }
        }
      }
    }
  }
}
Really very little Terraform needed for that one :)
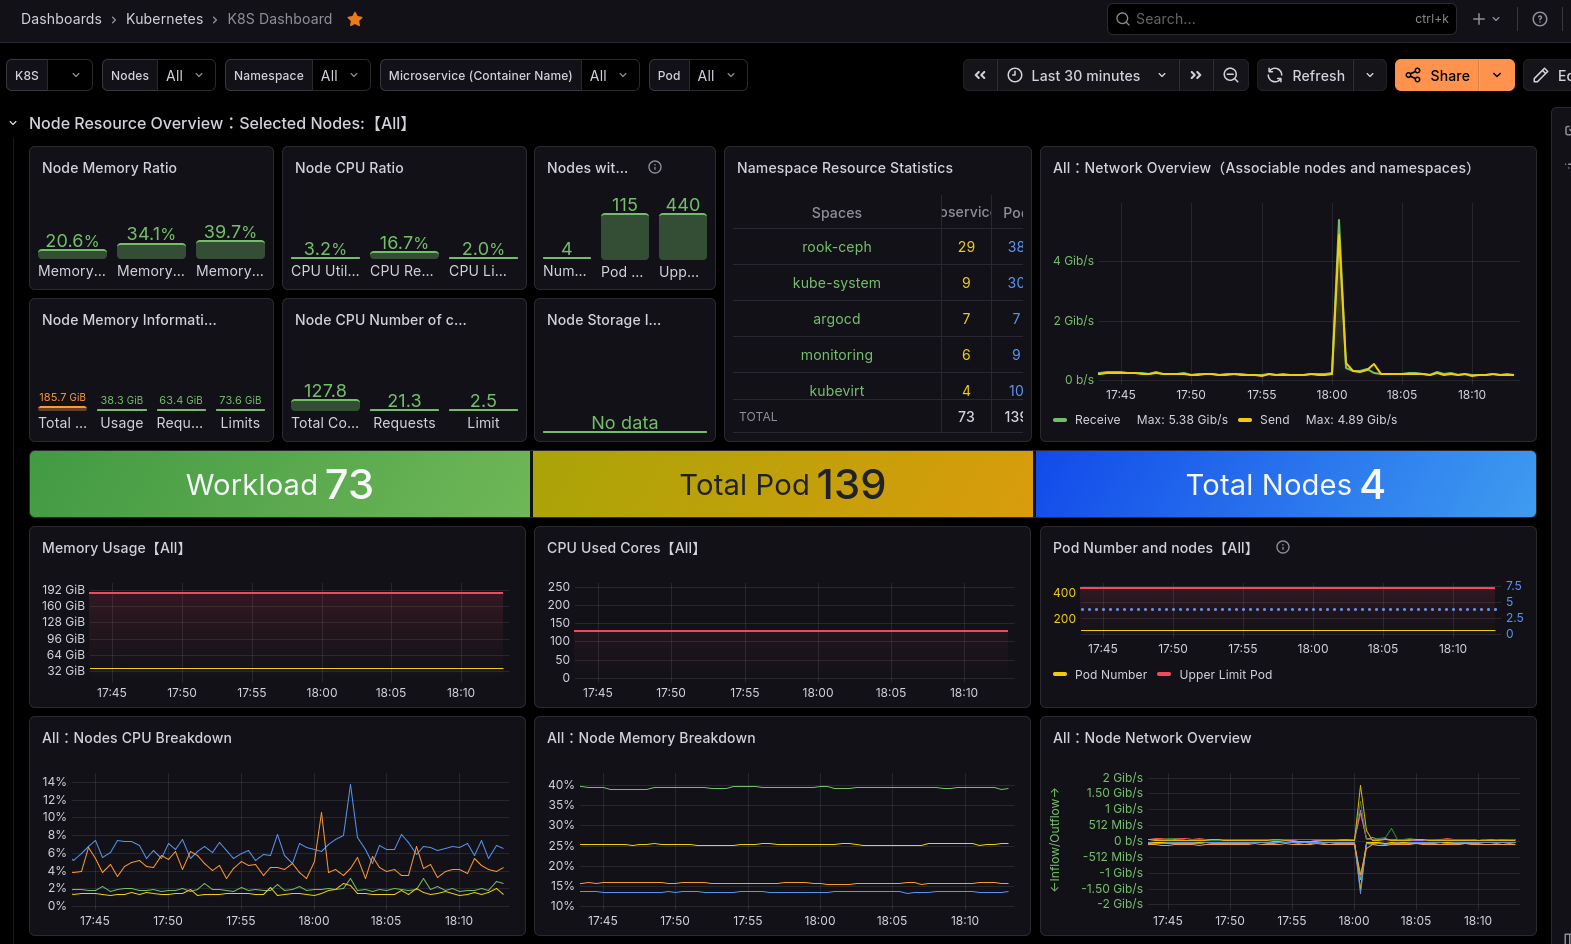
To facilitate operational monitoring, a full Grafana Stack (Grafana, Prometheus, Alertmanager, Loki, Pyroscope... e.t.c.) is usually the best bet for a SPOG to view everything. Helpfully there are very mature integrations for most of these components, most notably kube-prometheus-stack. kube-prometheus-stack provides an operator and controller to deploy the various Grafana services within a cluster, but additionally provides CRDs and config hooks to allow data source, dashboards and alerts to be imported from CRDs. Many popular applications will ship with these inbuilt, and so usually getting full monitoring for your application is as simple as turning on a monitoring value in a helm chart.
resource "helm_release" "kube_prometheus_stack" {
  name       = "kube-prometheus-stack"
  repository = "https://prometheus-community.github.io/helm-charts"
  chart      = "kube-prometheus-stack"
  version    = var.kube_prometheus_stack_version
  namespace  = kubernetes_namespace_v1.monitoring.metadata[0].name

  values = yamlencode({
    grafana = {
      adminPassword = var.grafana_admin_password

      persistence = {
        enabled          = true
        type             = "pvc"
        storageClassName = var.prometheus_storage_class
        size             = var.grafana_storage_size
      }

      ingress = {
        enabled          = true
        ingressClassName = var.ingress_class_name
        annotations = {
          "cert-manager.io/cluster-issuer" = var.cluster_issuer_name
        }
        hosts = ["grafana.${var.ingress_domain}"]
        tls = [{
          secretName = "grafana-tls"
          hosts      = ["grafana.${var.ingress_domain}"]
        }]
      }
    }

    # Allow prometheus to detect all monitors in all namespaces, setup retention
    prometheus = {
      prometheusSpec = {
        retention = var.prometheus_retention
        enableRemoteWriteReciever = true
        podMonitorNamespaceSelector = {
          matchLabels = {}
        }
        podMonitorSelectorNilUsesHelmValues = false
        serviceMonitorNamespaceSelector = {
          matchLabels = {}
        }
        serviceMonitorSelectorNilUsesHelmValues = false
        ruleNamespaceSelector = {
          matchLabels = {}
        }
        ruleSelectorNilUsesHelmValues = false
        storageSpec = {
          volumeClaimTemplate = {
            spec = {
              storageClassName = var.prometheus_storage_class
              accessModes      = ["ReadWriteOnce"]
              resources = {
                requests = {
                  storage = var.prometheus_storage_size
                }
              }
            }
          }
        }
      }
    }

    prometheus-node-exporter = {
      prometheusSpec = {
        scrapeInterval = "30s"
      }
    }

    alertmanager = {
      enabled = true
      config = {
        route = {
          receiver = "personal-discord"
          group_by = [ "alertname", "namespace" ]
          routes = [
            {
              receiver = "null"
              matchers = [ "alertname = Watchdog" ] # Watchdog is an always-firing alert, probably don't want it getting to your actual receiver
            },
          ]
        }
        receivers = [
          {
            name = "null"
          },
          {
            name = "personal-discord"
            discord_configs = [{ webhook_url = "XXX" } ] # Discord webhook for alertmanager alerts
          }
        ]
      }
    }

    # Targets not compatible with Talos
    kubeControllerManager = { enabled = false }
    kubeScheduler         = { enabled = false }
    kubeEtcd              = { enabled = false }
  })
}
The kube-prometheus-stack will need to be deployed in a privileged namespace, as privileged node-exporter pods are used to scrape the cluster nodes for low-level metrics.
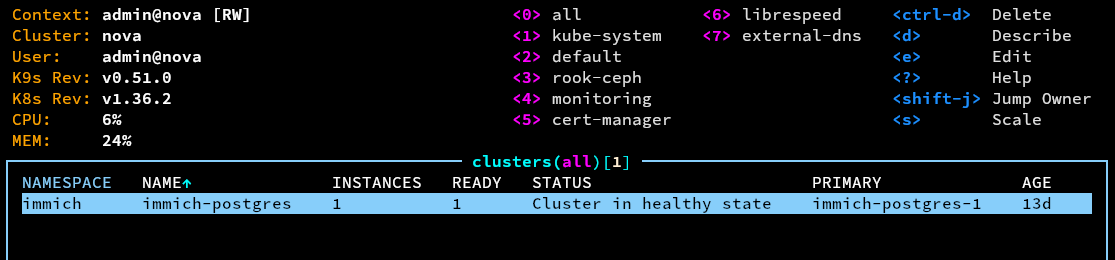
One of the most difficult yet critical applications to deploy and manage right are usually databases. CloudNativePG (CNPG) is a Postgres operator that takes most of the scary bits of running a database and makes them boring... which is honestly exactly what you want from a database. Rather than hand-rolling a StatefulSet and praying, you just define a Cluster resource and let the operator deal with all the parts I'd definitely get wrong at 2am:
- Easy HA - it runs a primary with a few replicas and handles promoting one of them if the primary falls over, shuffling the service endpoints around so apps don't have to care which pod is currently in charge.
- Easy upgrades - rolling onto a new Postgres version is just bumping a field and letting the operator cycle through everything, rather than a scary in-place
pg_upgrade. - WAL backups - it'll continuously ship WAL off to object storage (R2 again), which gets you point-in-time recovery basically for free. Very much the kind of thing you swear you'll set up later and then deeply regret not having when later shows up.
The lesson here, boring as it is, is that the database is the one thing you really don't want to be winging. Letting a well-tested operator own all of that is a lot smarter than trusting my own bash scripts and good intentions.
# Sample CNPG operator deployment
resource "helm_release" "cnpg" {
  name       = "cloudnative-pg"
  repository = "https://cloudnative-pg.github.io/charts"
  chart      = "cloudnative-pg"
  version    = var.cnpg_operator_version
  namespace  = kubernetes_namespace_v1.cnpg_system.metadata[0].name
}
And just like that, even my databases are boring :)
🎉?
Yippee! Everything's deployed and working.
Next steps / TODO
- Actually deploy all of my applications? Home Assistant as a KubeVirt VM, then Immich, Jellyfin, Vaultwarden and LibreSpeed
- Play around with the full Grafana monitoring stack
- Look into security hardening of the platform and services?
- Test resliency and failover of various components
- Test how seamless the Talos-managed-by-terraform upgrade process actually is
All of the source code for the full deployment is over on my GitHub. Feel free to use it as inspiration or reference, use it to deploy things yourself, or tear me apart for all the ways I did things wrong in a GitHub issue <3